How Indian Kitchens Can Grow Their Own Nutritious Microgreens In Just 10 Days
In many Indian households, the tradition of adding freshness to meals has always been cherished. Think of the sprinkle of fresh coriander on dal fry, the mint leaves in a glass of buttermilk, or the tiny sprouts tossed into a salad.
Today, another green companion has found its way into our kitchens: microgreens.
These tiny, tender shoots of vegetables and herbs aren’t just pretty garnishes on a plate; they are nutrient-packed powerhouses, believed to carry more vitamins and antioxidants than their mature counterparts.
From boosting immunity to aiding digestion, microgreens are steadily becoming a staple in urban homes where health meets convenience.
But what if you didn’t have to buy them at fancy organic stores? What if a small tray on your kitchen counter could supply you with fresh microgreens every week?
Here’s a step-by-step guide that you can follow.
Step 1: Choosing your seeds
You can grow sunflower, fenugreek, mustard, radish, coriander, and even wheatgrass. For beginners, mustard and fenugreek are the easiest to grow. The key is to buy untreated, organic seeds safe for consumption.
Step 2: Setting up the growing tray
You can use an old baking tray, a few shallow plastic boxes, or even unused tiffin lids. Punch a small drainage hole at the bottom to avoid waterlogging. Spread a thin layer of cocopeat (a natural fiber from coconut husk), though regular potting soil could also do the trick.
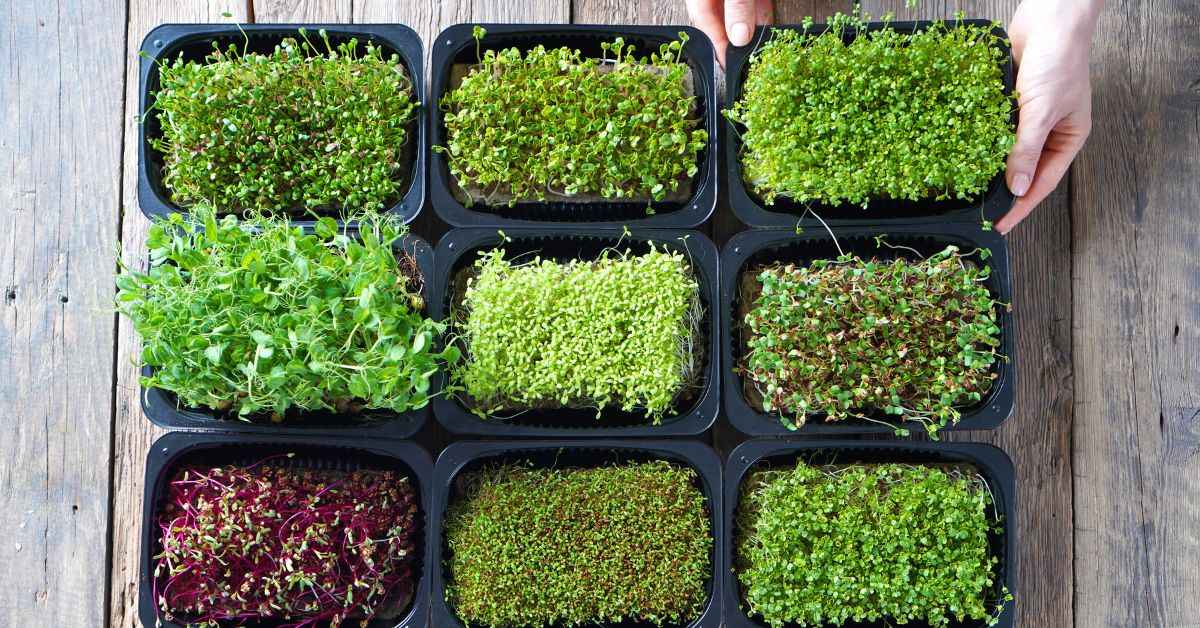 For beginners, mustard and fenugreek are the easiest to grow.
Step 3: Sowing the seeds
Soak the seeds overnight: mustard for six hours, sunflower for almost 12. The next day, scatter them evenly across the soil surface, gently pressing them down. Instead of burying them deep, sprinkle a fine layer of cocopeat to cover them.
Step 4: Water and darkness
Don’t water too much; just a gentle mist from a spray bottle would suffice. Cover the tray with a lid, and create a dark, cozy environment for the seeds to germinate. In two days, the soil will be alive with tiny white shoots pushing upward. Every morning, check moisture levels and mist whenever the soil feels dry.
Step 5: Light and care
As the sprouts grow taller, remove the cover and place the tray near the window where sunlight streams in. Within a week, the shoots will turn into bright green leaves, ready to harvest.
Step 6: Harvesting the greens
About 10 days after sowing, take a clean pair of scissors and snip the delicate greens just above the soil line.
Toss them into a poha breakfast, stir them into dal, or add a handful to your sandwich. The crunch, the colour, and the nutrition are unbeatable.
Microgreens don’t just save money; they transform the way we eat. They require no garden, grow in any season, and ask for minimal effort.
Happy gardening!
News